Quantum secret Santa part 2
Running Q# code via a python host program, and executing this on multiple different targets.


This post is part of the Q# advent calendar 2021
Last year I wrote how to create a Secret Santa raffle with Grover search implemented in Q#, see here. This was a command line program which required setting up the QDK locally.
This year we are going to change that with the help of Python, we will reuse the same Q# code but expose it via a website and use different backends to execute the code! These backends can be classic simulators or even actual quantum hardware.
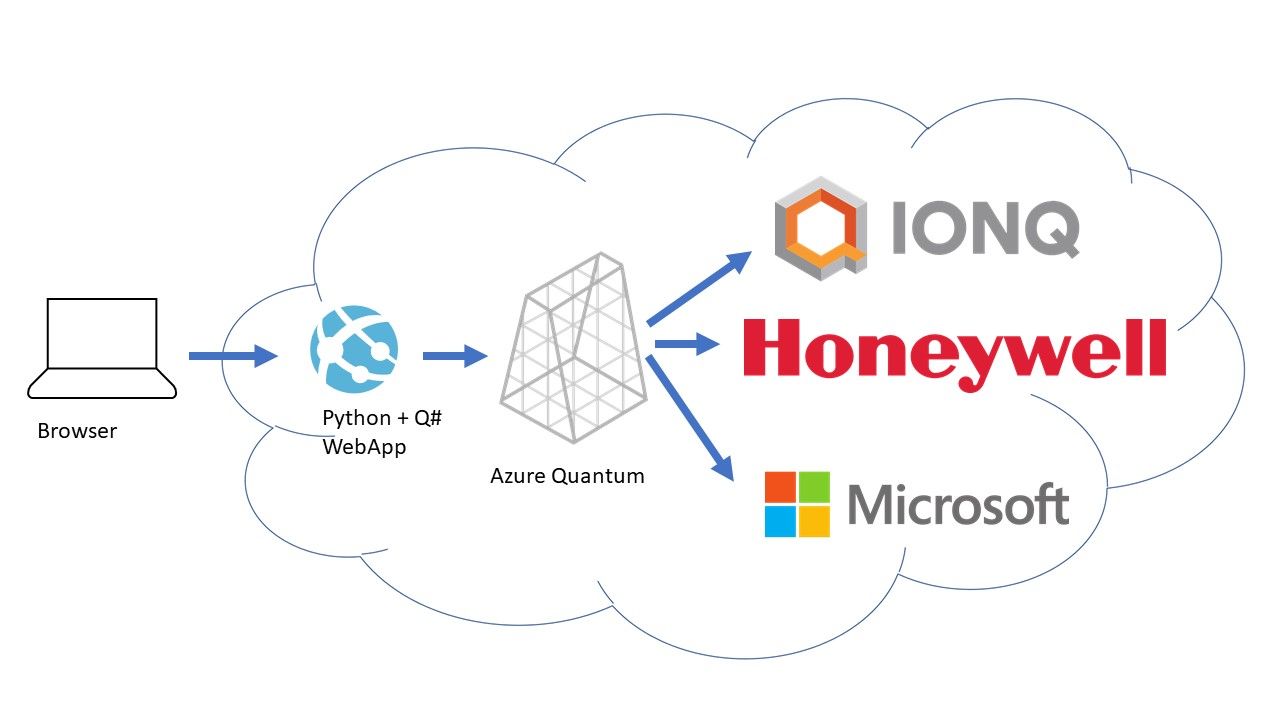
The goal is to have a small website which can call a Python REST API, hosted on Azure which will execute the Q# code. This Q# can then be executed in three possible ways:
- On the local machine where the API is hosted (using QDK simulator)
- Dispatched to a remote simulator
- Run on actual quantum hardware
A high-level overview would look like this:
Lets start with the Q# code
This is almost completely the same as described is my previous blog. So I will not dive into the Q# code this time. The only change is that the main function RunSecretSanta now takes an argument for the total number of people that will play in the raffle and it return a value. The signature for the main function looks like this:
operation RunSecretSanta (NumPlayers : Int) : Bool[] {
	// ...
}
This means you provide it a number of players (NumPlayers) as input and as a return you will get an array of Bool values which tells you who has to get who a present.
Build a Python app to call this Q# code
Calling Q# code from Python is really easy. Once you have the QDK installed you only need to run pip install qsharp, or use Conda like described here.
When this is setup using two lines of code you can call the Q# function which is shown above. Make sure your Q# code and Python code are in the same folder. When you execute this the Q# code like shown here, the execution will be on a local simulator.
import qsharp
from QuantumSecretSanta import RunSecretSanta

result = RunSecretSanta.simulate(NumPlayers=3)
Once you have this working it is easy to integrate this into a REST API. In this case I use FastAPI, which is an easy to use Python library to create a REST API. With FastAPI and the code above I can quickly create a GET route that will trigger this function, and execute the Q# code locally.
from fastapi import FastAPI

import qsharp
from QuantumSecretSanta import RunSecretSanta

app = FastAPI()

@app.get("/play/local/{num_players}")
def run_local(num_players: int):
    result = RunSecretSanta.simulate(NumPlayers=num_players)
    return {"players": result}
When I would run this using uvicorn host:app --reload, and navigate to the page http://127.0.0.1:8000/play/simulator/3 I would get this result:
{"players":[false,true,true,false,false,true]}. The only thing left would be to parse that into a readable result, which we will look at later.
Add more execution targets
A local simulator will only simulate smaller number of players (3-4). However, a cloud simulator or actual quantum device might be able to simulate more players. Therefore, we want to add a new route to our API which will execute the same Q# code but use a cloud simulator as target.
from fastapi import FastAPI

import qsharp.azure
from QuantumSecretSanta import RunSecretSanta

app = FastAPI()
qsharp.azure.connect(resourceId="/subscriptions/.../Microsoft.Quantum/Workspaces/WORKSPACE_NAME", location="West Europe")
qsharp.azure.target("honeywell.hqs-lt-s1-sim")

@app.get("/play/simulator/{num_players}")
def run_simulator(num_players: int):
    result = qsharp.azure.execute(RunSecretSanta, NumPlayers=num_players, shots=500, jobName="Quantum secret santa")
    return {"players": result}
Here I use the qsharp.azure.connect() function, to make a connection to an Azure Quantum workspace. You can use service principals to log in to Azure Quantum without any interaction see more details here.
Consuming the API in a browser
Now we have an API which exposes multiple routes to solve the secret Santa raffle on different targets we need to show the results. Without going in to much detail because you can look through the whole code base here, this is how it looks (at the bottom of the page is an embedded version of the site to try yourself):
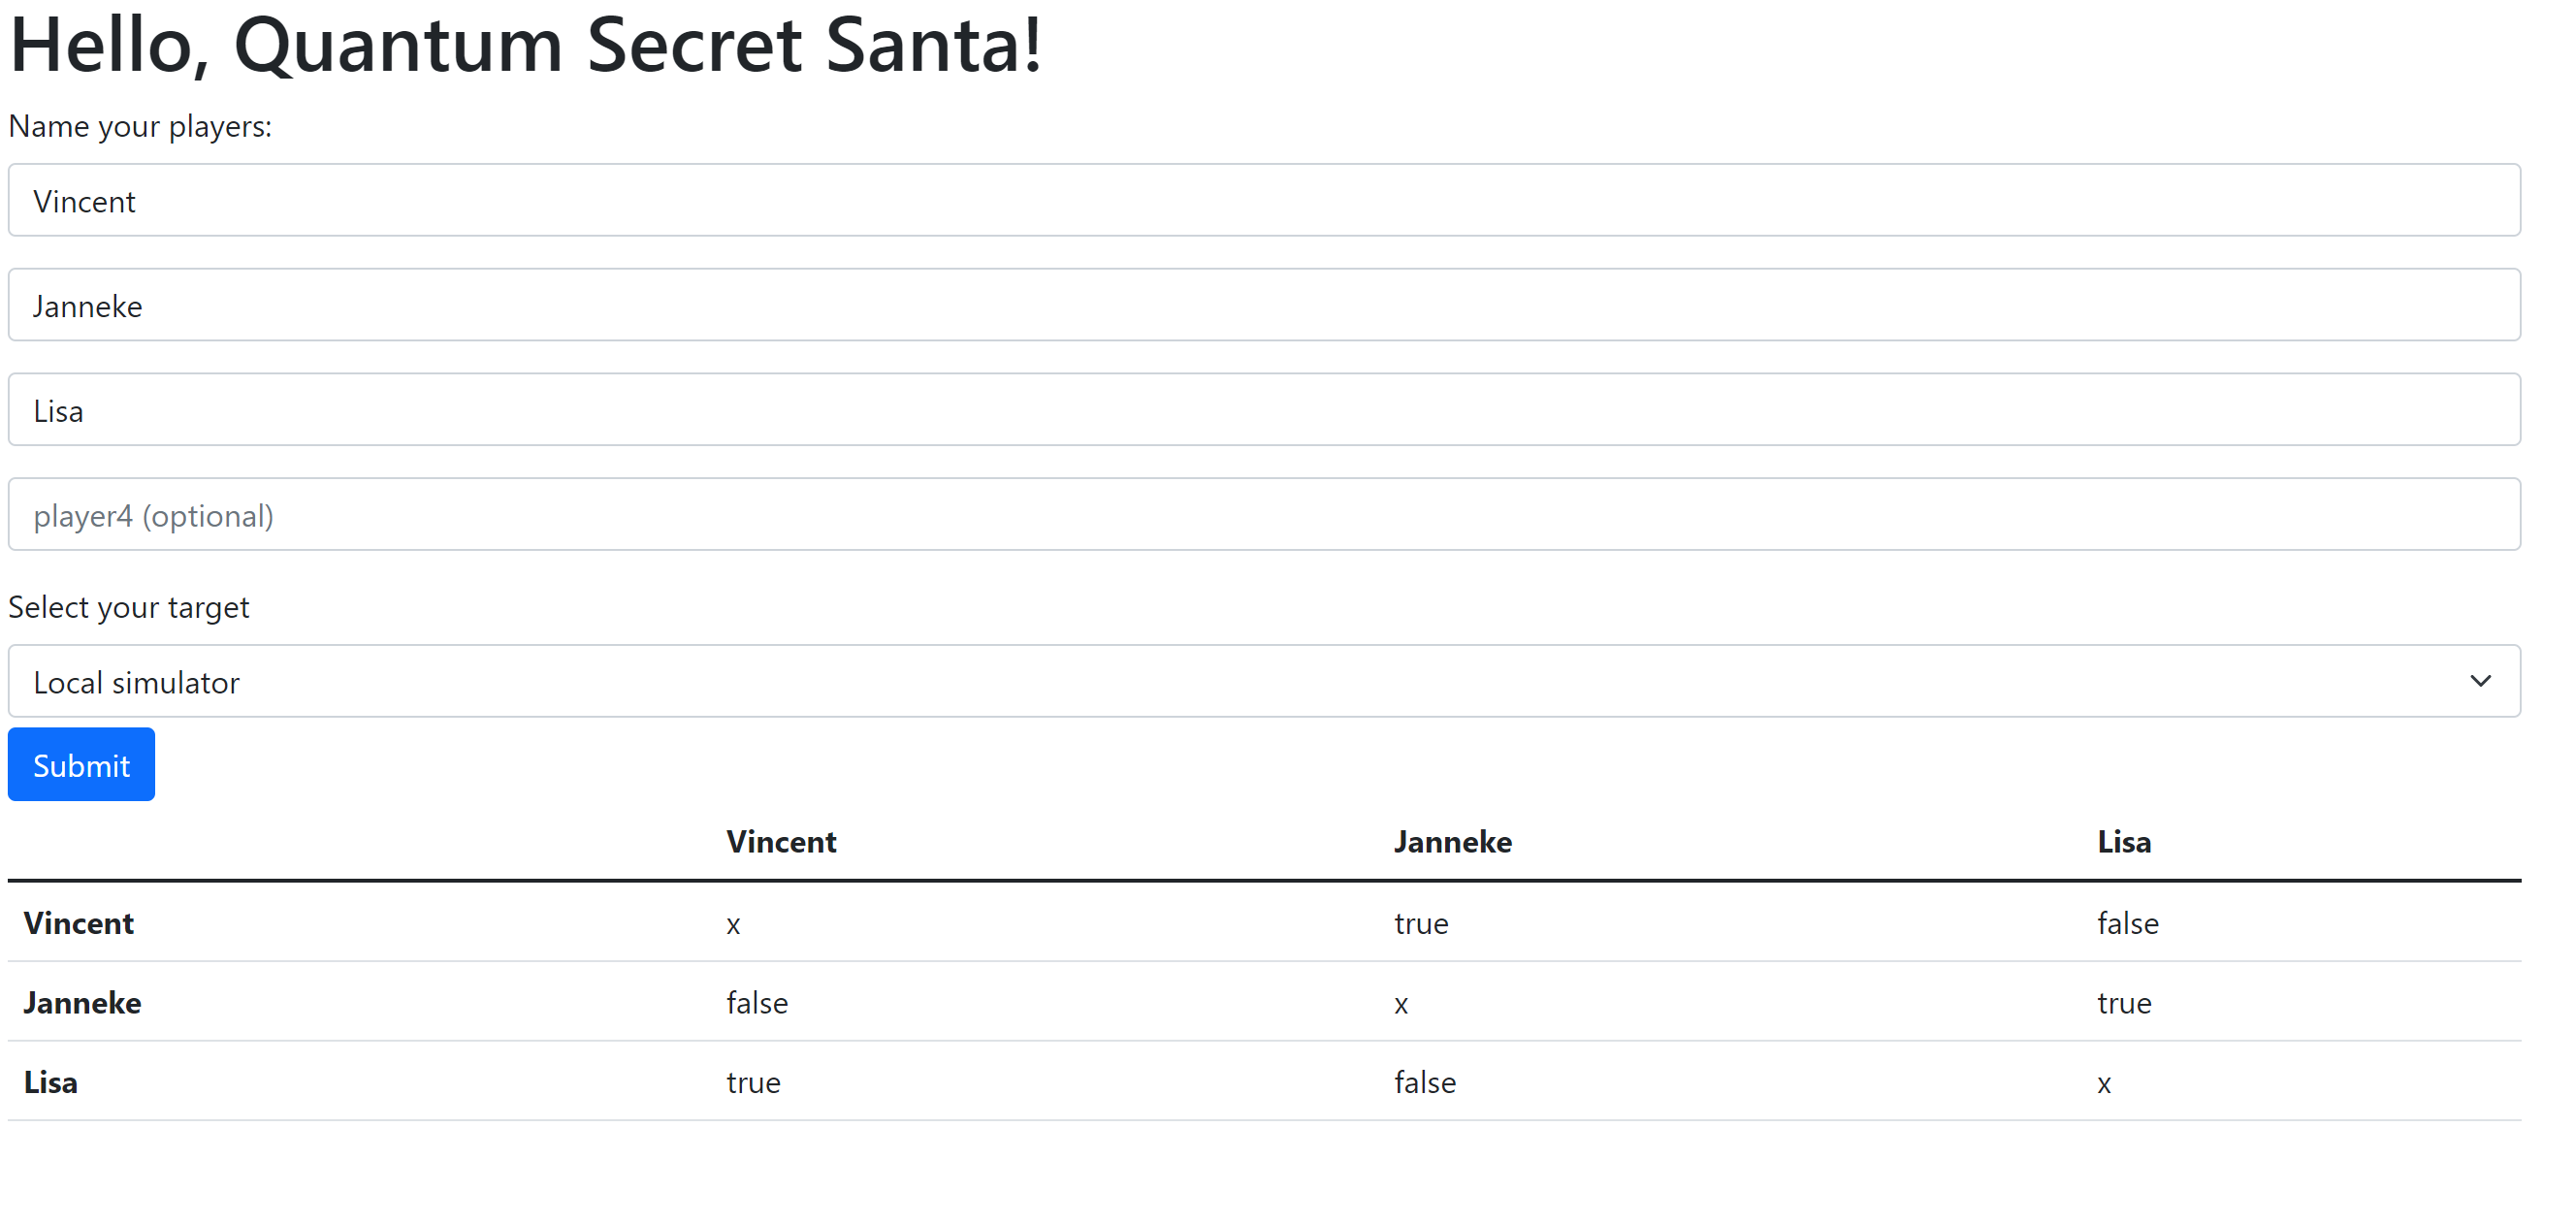
This page will allow you to name the players, select a target and finally execute. On the demo site you can only use the local simulator.
Publish this to an Azure Web App using Docker
To make it easy to deploy to azure or any other service I want to package this as a Docker container. This will make sure it runs everywhere and I do not need to worry about specific dependencies that QDK or other tools bring. Using the Dockerfile below, we can create a container with all the dependencies and code.
The base image has the QDK, Python and .Net core 3.1 installed already.
FROM mcr.microsoft.com/quantum/samples:latest

ENV PORT 8080
EXPOSE 8080

WORKDIR /code

COPY ./requirements.txt /code/requirements.txt

RUN pip3 install --no-cache-dir --upgrade -r /code/requirements.txt

COPY ./ /code/

CMD ["uvicorn", "host:app", "--host", "0.0.0.0", "--port", "8080"]
All Done
All the code can be found here. I hope you see how easy it is to execute Q# against any target.
A deployed version can be found here: qshaprdemo.azurewebsites.net and below, it runs a bit slow on this hardware but shows what you can do.